BLOG
PINEAPPLE UPSIDE DOWN CAKE
INGREDIENTS:
Yellow cake mix (Duncan Hines)
Butter - 1 stick
Brown Sugar - 1 cup
Can of crushed pineapple
Cool Whip
DIRECTIONS:
Prepare cake mix according to directions. In a 9x13 pan, melt stick of butter and add brown sugar. Stir. Add crushed pineapple. Pour cake mix over the top.
Pineapple Upside Down Cake: A Tropical Taste from the 1920s
A classic that continues to delight, pineapple upside down cake has a fairly lengthy history that dates back to The Roaring Twenties. With the invention of canned pineapple manufacturing coupled with a trend for upside down cakes, it was only a matter of time before someone baked it into existence.
In the late 1800s, cakes that had typically been referred to as ‘skillet cakes’ were now being termed ‘upside down cake.’ Up to this point, ovens weren’t all that common. And the ones that existed weren’t all that reliable either. Thus, skillet cakes were made on the stovetop.
However, the practice of flipping a cake out of a pan, inverting it to reveal a topping, was popular long before this. Some say this was a cooking practice that was around even in the Middle Ages. The first types of upside down cakes didn’t have pineapple, though they did have apples and cherries.
Once Jim Dole created what we all know as the Dole Company in 1901 (it started as the Hawaiian Pineapple Company), canned pineapple – which predates sliced bread – became a true contender in the dessert world. As it turned out, the Hawaiian Pineapple Company sponsored a contest for pineapple recipes in 1925. There were 60,000 submissions and of those, 2,500 were for pineapple upside down cake.
From there, pineapple upside cake only became more popular. It was featured in advertisements, cookbooks, and magazines. The earliest printed recipes came from a Seattle charity cookbook in 1924 where it was listed as ‘Pineapple Glacé,’ and from Gold Medal Flour’s full-page ad in a 1925 women’s magazine.
Pineapple upside down cake enjoyed a surge of popularity in the 1950s and 1960s as well. While it’s still popular today, it evokes those classic and nostalgic vibes of family dinners with grandparents and the sweetness of tropically exotic vacations.

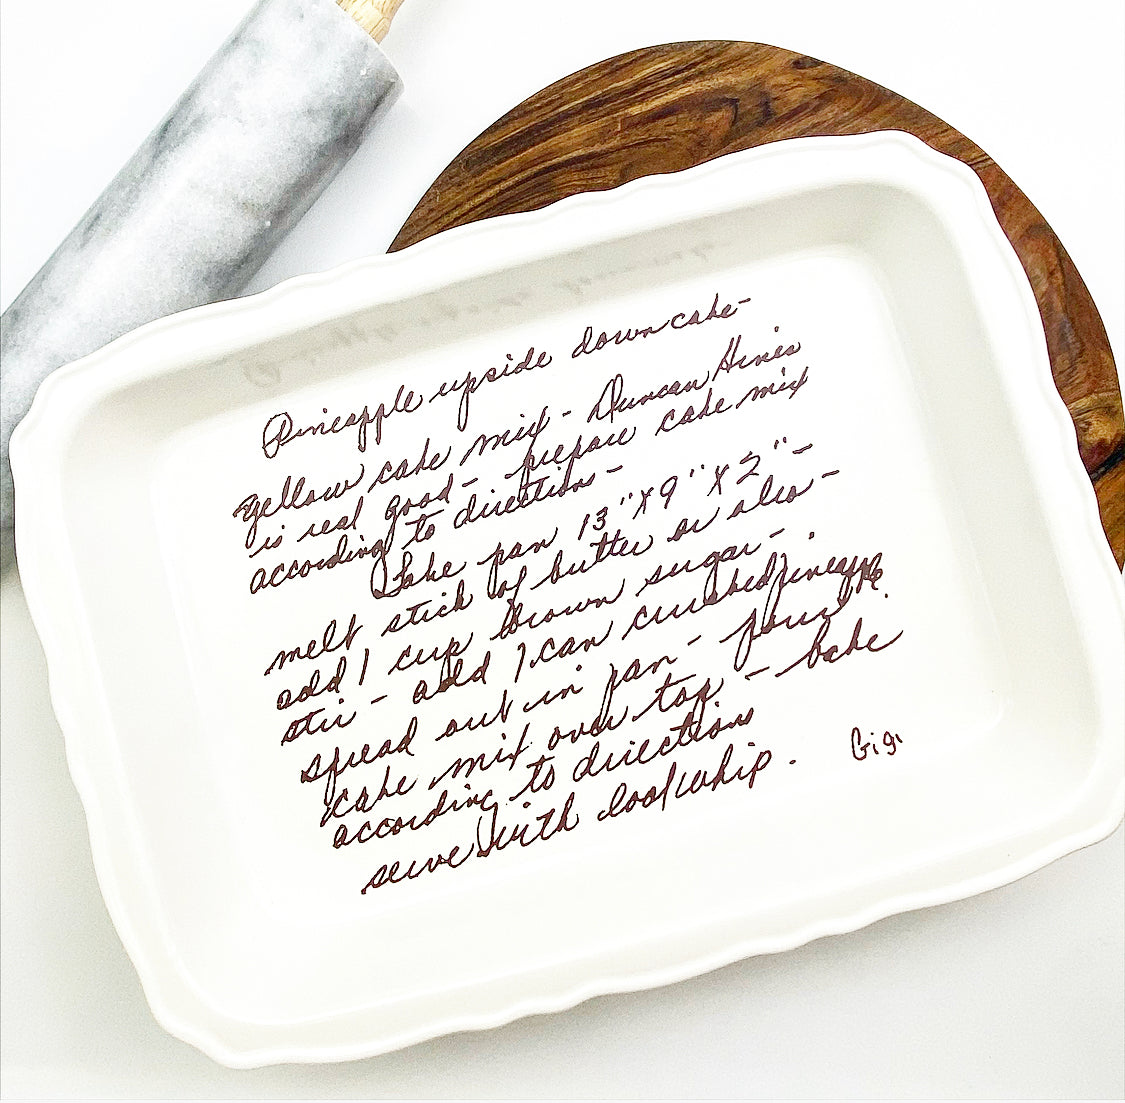
Gigi’s Pineapple Upside Down Cake
It’s not clear when Gigi hand-wrote this classic recipe down on a recipe card. But what is clear is that she’s a fan of Duncan Hines’ yellow cake mix. Duncan Hines itself didn’t come into existence until 1951, and judging from the penmanship, Gigi likely wrote this sometime between then and the 1960s or 1970s.
On the recipe card, she’s indicated that Duncan Hines’ yellow cake mix “is real good” and instructs to follow the box mix instructions. You’ll melt butter into a 9” x 12” x 2” pan, add a cup of brown sugar and stir. Then you’ll add a can of crushed pineapple and pour the cake batter on top and bake as the box details. According to Duncan Hines, that’s 350F for 23 to 28 minutes.
Don’t forget the finishing touch for serving…Cool Whip, another classic from a bygone era that is still cherished today. For the full recipe, look below, and enjoy taking your taste buds to the past with this timeless pineapple upside down cake recipe!
OSGOOD PIE
INGREDIENTS:
2 c. sugar
1 tsp. allspice
1 c. raisins
1 c apples
4 eggs whites (stiffly beaten)
4 egg yolks (beaten)
1 tbsp cinnamon
1 tsp cloves
1 c nuts (chopped)
DIRECTIONS:
Beat egg whites, set aside. Mix all ingredients together and fold into the egg whites. Pour into unbaked pie shells.Bake at 300 degrees for 45 minutes - 1 hour.
OSGOOD PIE
INGREDIENTS:
2 c. sugar
1 tsp. allspice
1 c. raisins
1 c apples
4 eggs whites (stiffly beaten)
4 egg yolks (beaten)
1 tbsp cinnamon
1 tsp cloves
1 c nuts (chopped)
DIRECTIONS:
Beat egg whites, set aside. Mix all ingredients together and fold into the egg whites. Pour into unbaked pie shells.
Bake at 300 degrees for 45 minutes - 1 hour.
Osgood Pie: The Revival of a Largely-Forgotten Dessert
Unlike apple, blueberry, or even chocolate pie, the Osgood pie has been largely left behind, a relic of baking from the mid-1900s. The mysterious name and disappearance of this pie cooling on windowsills across America certainly deserves a revival.
Resembling a chess pie or vinegar pie, the Osgood pie was once thought to be named after someone with Osgood or Osgoode as their family name. Unfortunately, no one can seem to find any proper evidence of that being true.
The more popular theory is that it is short for “Oh So Good” pie, but again, no one can confirm this. Nor can they confirm that it originated somewhere in the Ozarks and is named ‘Osgood’ to represent this region.
What IS known about the Osgood pie is that it seems to be quite common in Texas cookbooks, which could be the true point of origin. Osgood pie was popular in the olden days, but somewhere in the 1950s and 1960s, it faded into obscurity.
Even the chess pies and vinegar pies that it is akin to aren’t all that popular these days. However, there is something to be said about resurrecting a classic. Especially for the holidays when we thrive on nostalgia to fuel the magic.
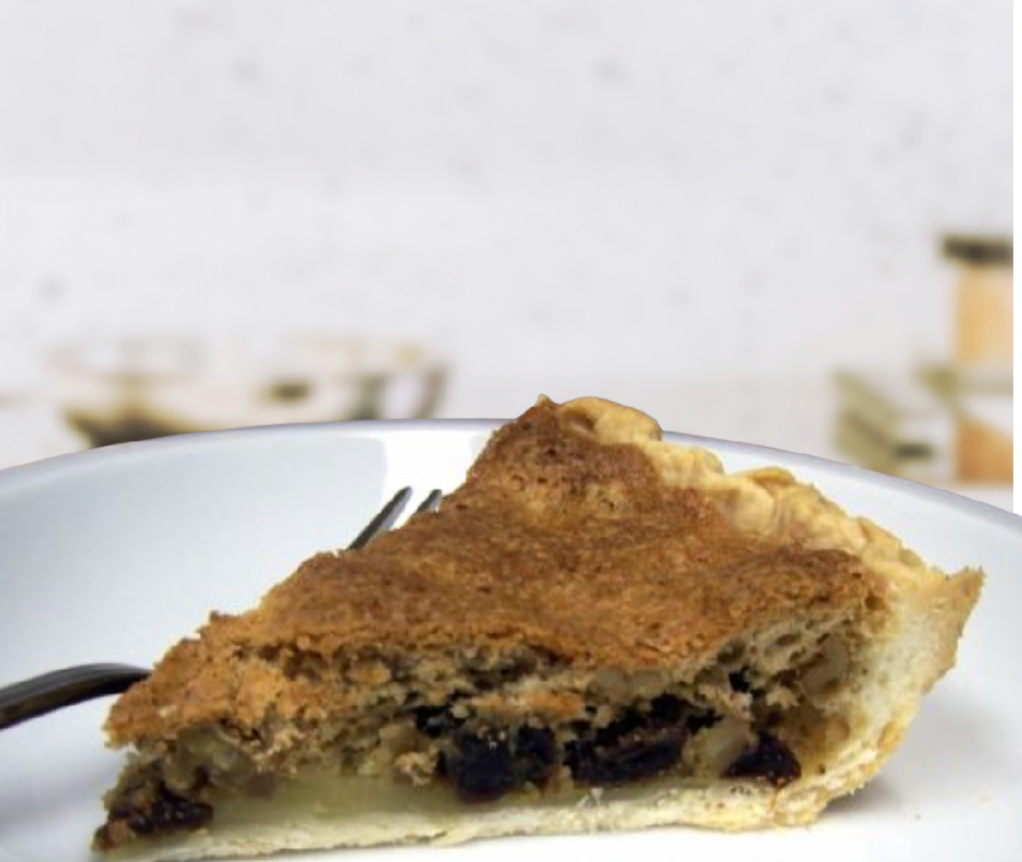
Osgood pies are made with egg yolks, stiffly beaten egg whites, sugar, chopped nuts, and raisins. In fact, it is most often described as a classic chess pie with raisins added in for good measure.
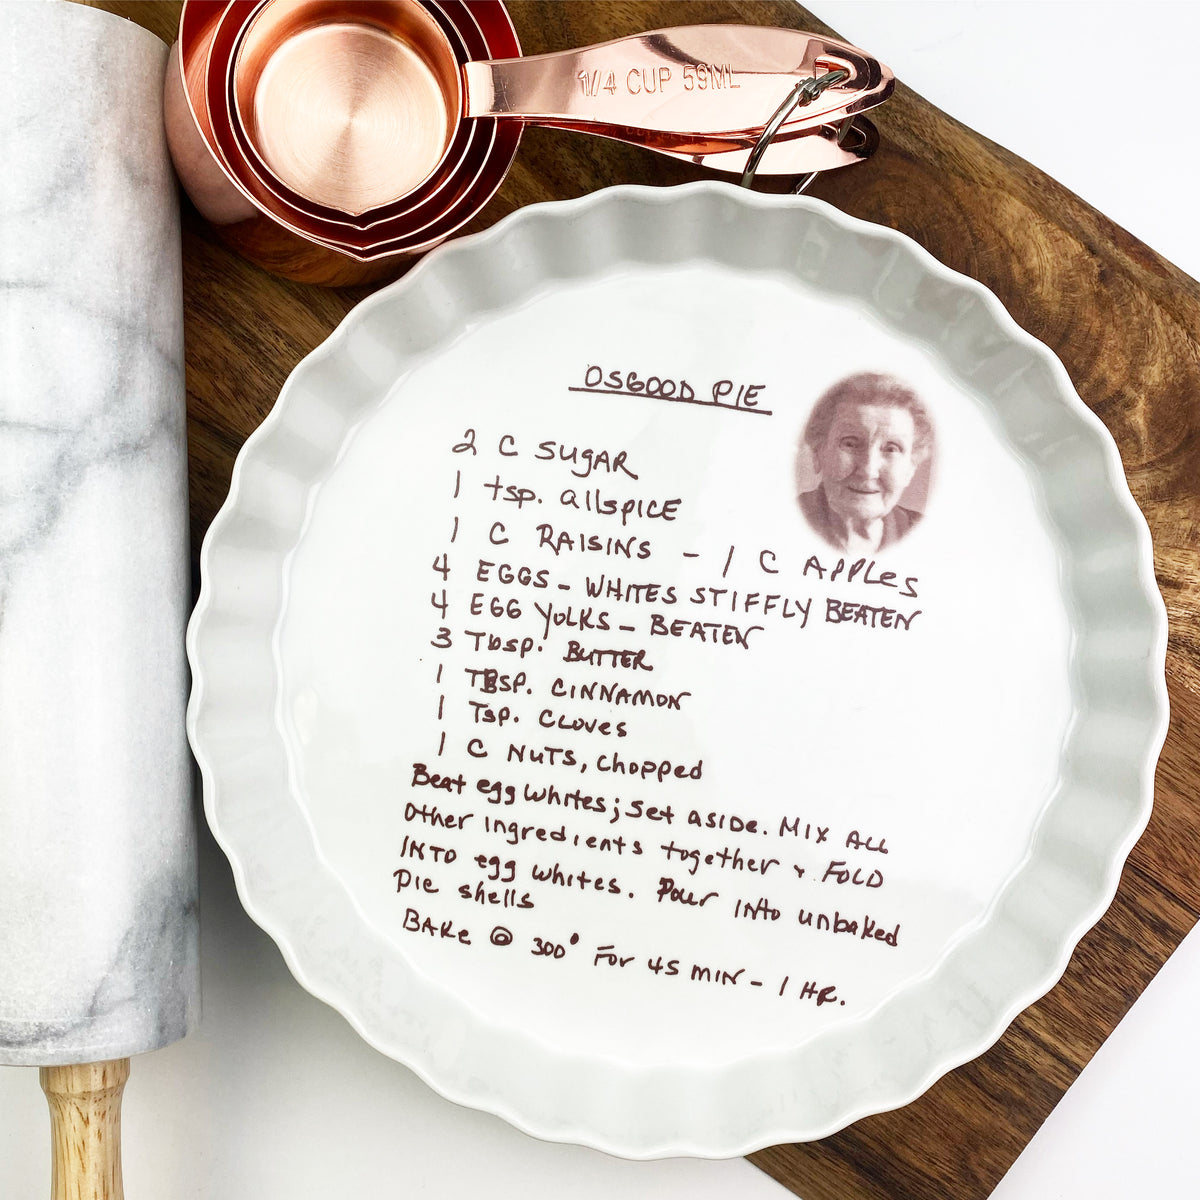
Classic Osgood Pie Recipe
The original author of this Osgood pie recipe is unknown, though it is sure to make for a special dessert at any gathering. It requires sugar, allspice, raisins, apples, stiffly beaten egg whites, beaten egg yolks, cinnamon, cloves, and chopped nuts. The taste will be similar to a delicate chess pie with lovely bits of raisins and apple peppered in for good measure.
Which kind of nuts should you use? That isn’t indicated, but based on other sources, pecans should be a good match. You’ll beat the egg whites, mix everything together, and then fold it all into your egg whites. Unbaked pie shells will serve as the vessel to contain them while baking.
Your oven should be set to 300F to make this classic pie. Expect it to take anywhere from 45 minutes to an hour. How will you know it’s ready? It should take on a slightly puffed look with a light-brown color. You’ll also notice it appears firm.
Let it cool and then it will be ready to serve. If you want to add whipped cream, that’s completely up to you, though it is recommended that you taste it as-is first to discover the true flavors of this pie from the past. The full recipe follows below so you can delight your guests at your next gathering!
BLONDE BROWNIES
INGREDIENTS:
2 Cups Flour
1 TSP Baking Powder
1 TSP Salt
1/4 TSP Baking Soda
2/3 C Butter
2 CUPS Firmly packed Brown Sugar
2 Eggs (slightly beaten)
2 TSP Vanilla
1 PKG (12 OZ) Chocolate chips
DIRECTIONS:
Heat oven to 350 degrees
Mix flour with baking powder, salt and baking soda. Melt butter, mix in sugar, stir in eggs and vanilla.
Add flour mixture, a small amount at a time, mixed well after each addition.Stir 1 cup of chips into the batter and spread in an ungreased 9x13 pan. Sprinkle with remaining chips and nuts.
Bake for 30 minutes, cool in pan, then cut into bars.
Makes 4 dozen brownies.
Blonde Brownies: The Original Precursor to Chocolate Brownies
Blonde brownies, or ‘blondies’ as they’re often called, pre-date the beloved chocolate brownies. With a rich vanilla flavor, they share a similar texture and shape to brownies. The key difference is the use of brown sugar instead of white sugar, which gives them more of a caramelized taste. They also don’t have any chocolate or cocoa included in the batter, though chocolate chips are usually thrown in for good measure.
Where did they come from though? That’s the subject of much debate, for no one is certain who originally whipped up the first blonde brownies. In the late 19th century, cookie bars were evolving, using molasses as the sweetener. However, the first published recipes for brownies came from Fanny Farmer. That recipe was included in the 1896 publication of The Boston Cooking School Cookbook. It contained no chocolate though which is what we call a blonde brownie or blondie today.
Blonde brownies have been around at least 10 years longer than chocolate brownies. In 1896, the only version around was a molasses-flavored cookie bar that contained no chocolate of any kind – cocoa, chocolate, or even chocolate chips – that was called ‘brownie.’ The name was inspired by characters called Brownies, made popular by Palmer Cox in books, stories, and cartoons.
Onward to 1906, Fanny Farmer updated her cookbook with a two recipes called brownies – one that was a blondie recipe and the other, a brownie recipe. After chocolate brownies hit the scene, the molasses-based brownies were called blonde brownies. Bakers started subbing in brown sugar for the molasses which gave it a new signature taste, sometimes earning them the name ‘butterscotch brownies.’
It wasn’t until the 1980s that the name ‘blondie’ really took hold. Call them what you like – blonde brownies or blondies – it doesn’t matter. What does matter is that you make them for your next occasion that requires a delectable dessert that can easily be eaten by hand.
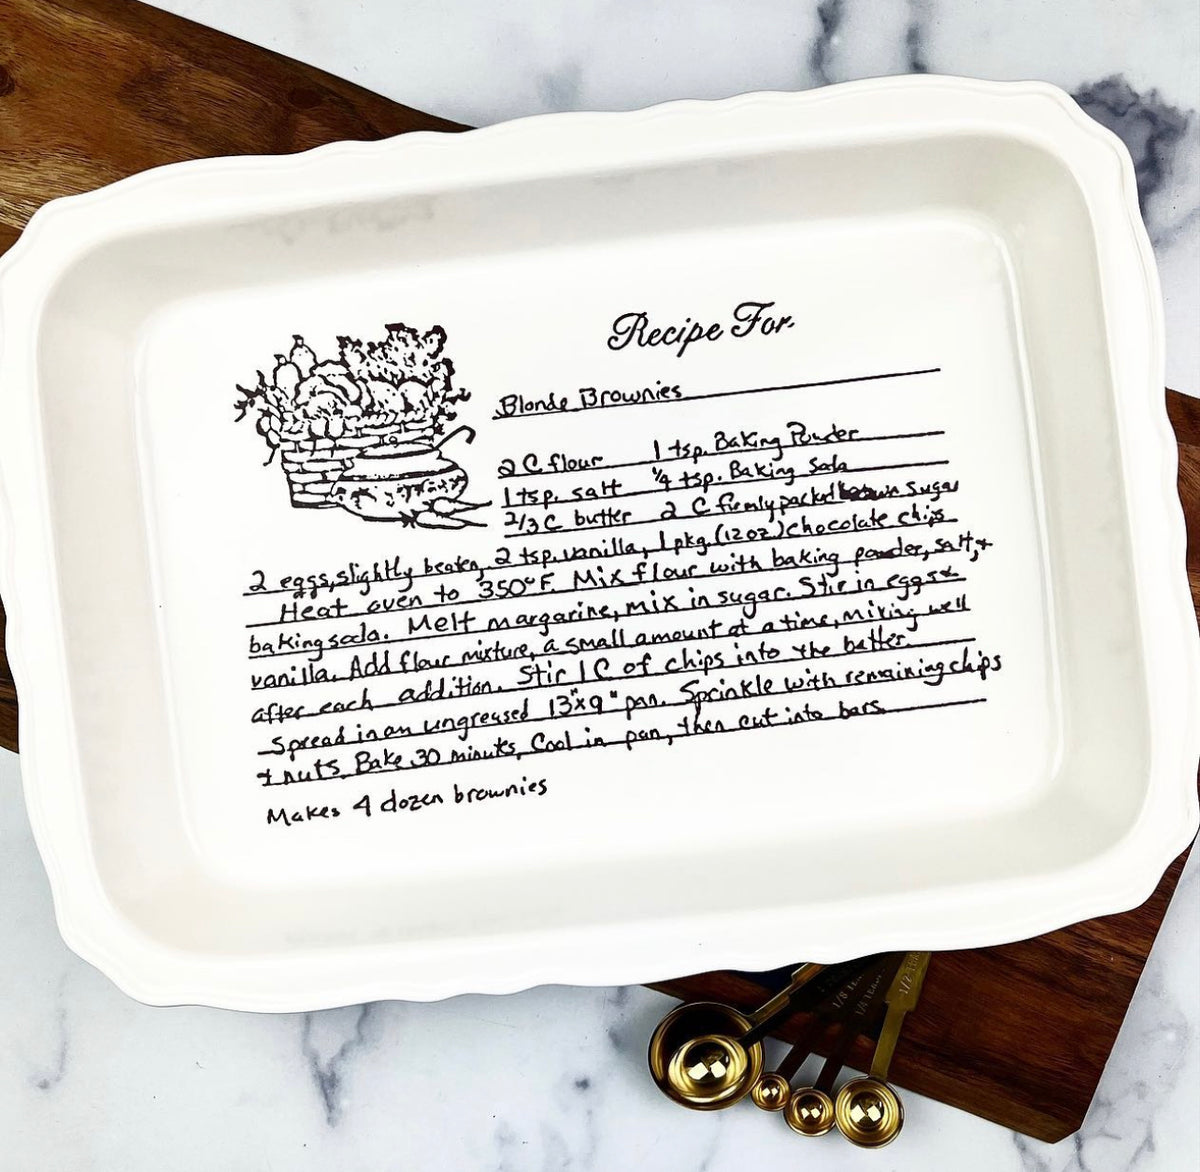
Bake These Blonde Brownies
We’re not sure who originally hand-wrote this blonde brownie recipe, or when. However, it is sure to give you delicious results the next time you need to bring a dessert to a potluck or have guests stop by. The sweet, warm vanilla flavors, chewy cookie bar texture, and pops of chocolate chips will be a favorite of everyone!
To make blonde brownies, you’ll need flour, baking powder, baking soda, salt, butter, brown sugar, eggs, vanilla, and chocolate chips. You can also top it with nuts if you’d like for an added crunch.
Get your oven to 350F and as it heats, mix the flour with baking powder, baking soda, and salt. Melt your butter and mix the sugar in. Then add the eggs and vanilla. Your flour mixture should be added a little at a time, then the chocolate chips. Spread it into your pan and top with more chocolate chips (and those nuts too if you want). Bake it for 30 minutes and then let cool.
The full recipe for blonde brownies is above so you can make them the old-fashioned way. Just make sure you let them cool in the pan first so your squares come out perfectly!

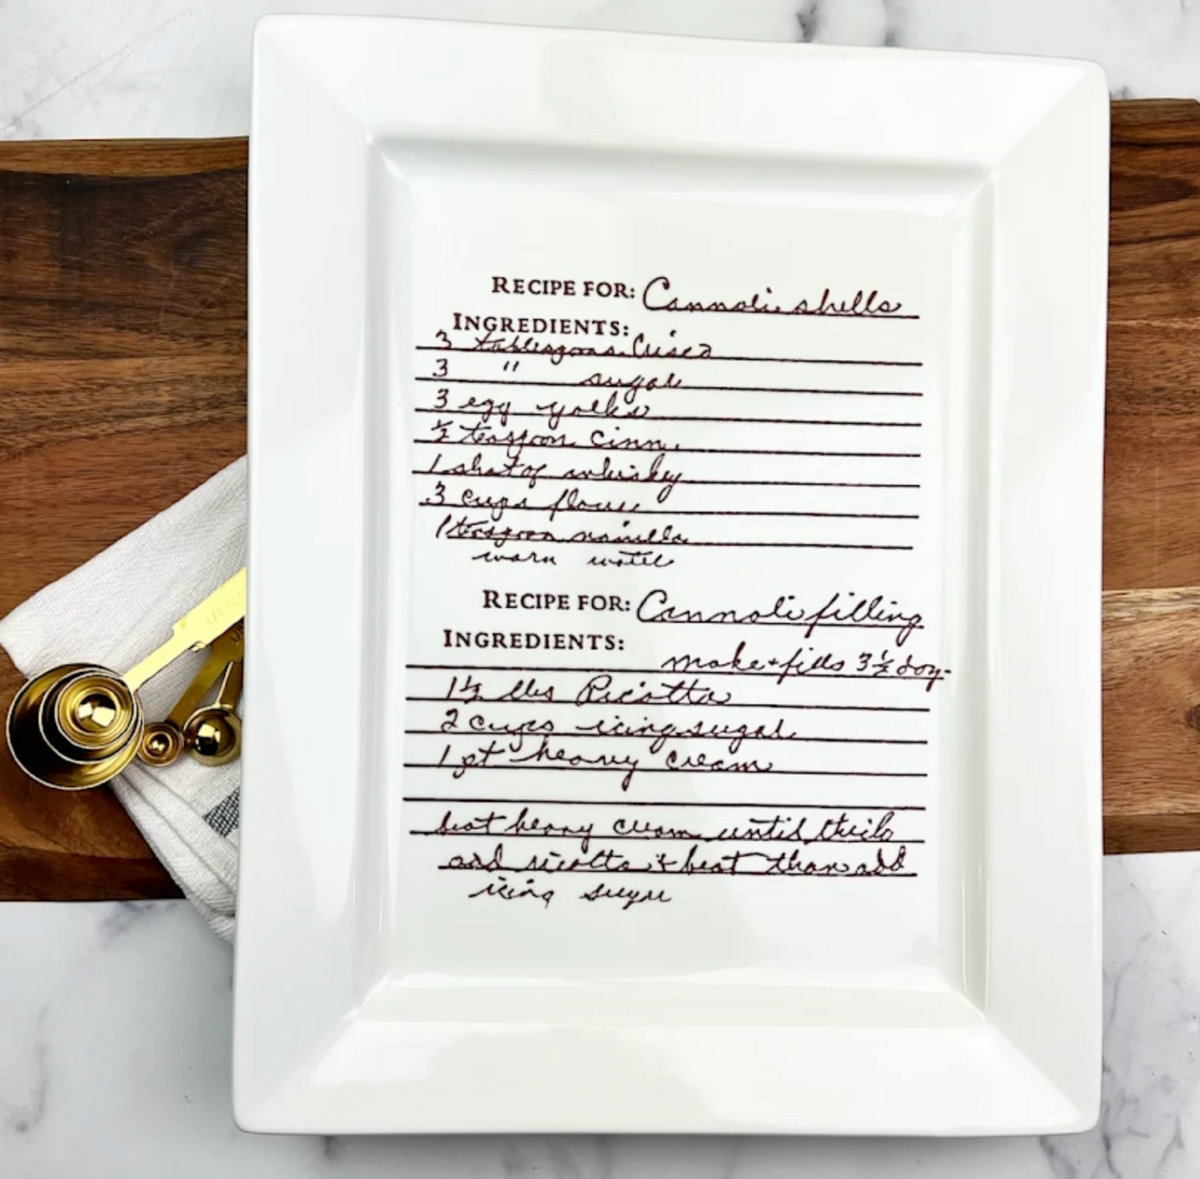
CANNOLI
Cannoli shells:
3 T crisco
3 T sugar
3 egg yolks
1 shot of whiskey
3 C flour
1 t Vanilla
Warm Water
Cannoli filling: (makes and fills 3 1/2 doz.)
1 1/2 lbs Ricotta
2 C icing sugar
1 pt heavy cream
beat heavy cream until thick add ricotta and beat than add icing sugar.
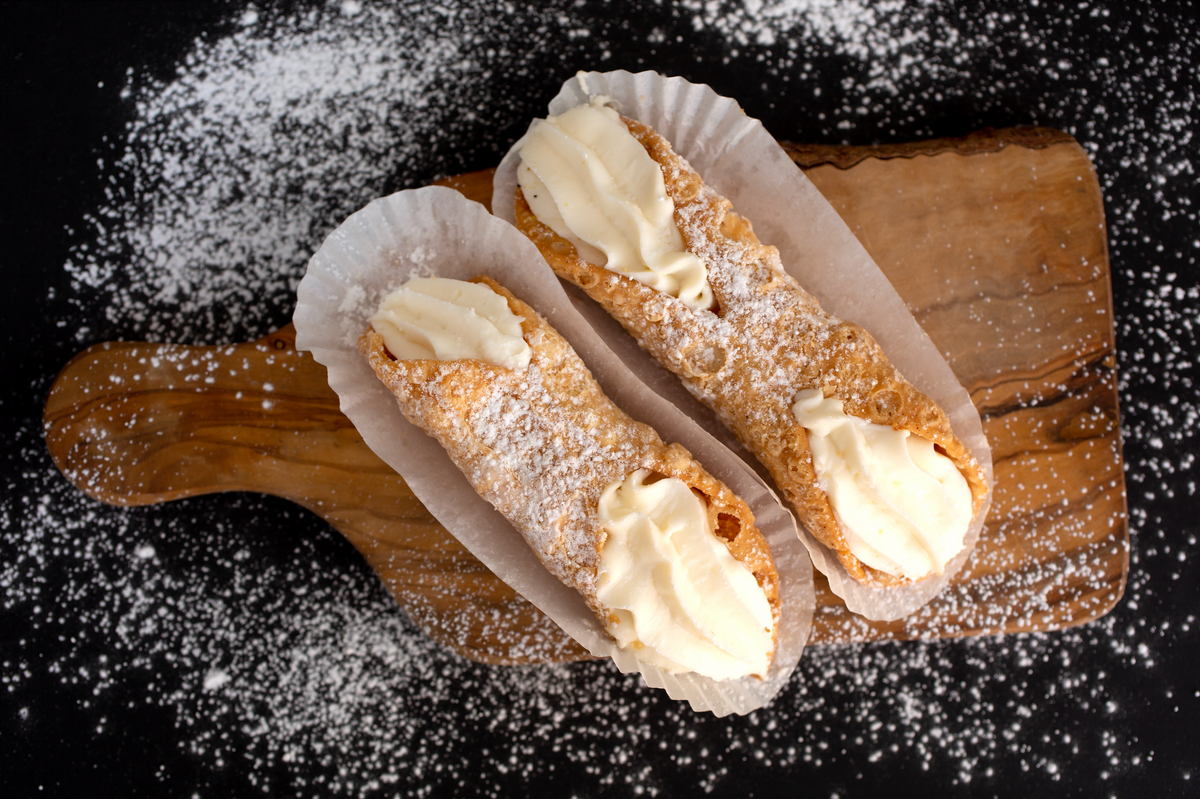
Cannoli: Italy’s Crunchy and Creamy Pastry of Perfection
When you dine out at your favorite local Italian restaurant, hopefully you’ve saved room for dessert. If so, you’re bound to find the cannoli to be the perfect way to complete your meal.
Cannoli comes from Palermo, a Sicilian city. Accordingly, this dessert with its hard pastry shell and sweetened filling was once specifically crafted for the Carnivale season. This festive time came before lent and featured an array of celebratory parades and masquerades, quite similar to what the French Quarter of New Orleans hosts as Mardi Gras today.
It was a symbol of fertility that Italian immigrants brought with them to the New World during the early 1900s. However, the recipe required some adaptations since it was hard to find certain ingredients. The changes they made still proved delicious, and as these sweet treats began popping up on menus at Italian-owned restaurants and bakeries everywhere, everyone clamored for more.
To make a great cannoli, the shell must provide an unwavering crunchy texture that gives way as you bite into it. Then, you’re greeted with the rich, creamy filling made from a base of ricotta. Sometimes, mascarpone is used while others have blended the two soft cheeses. It is then sweetened with sugar, and while the shells have cinnamon, some add this to the filling for an additional measure of sweetness.
Today, you can find cannoli made the traditional way as well as more contemporary versions. Some add chopped nuts like pistachios or almonds. Others put in chocolate chips, pumpkin, or candied orange peels. Perhaps the best thing to do is to try them every way you can, though starting with the original is always recommended.
Grandma Agnes’ Classic Cannoli Recipe
When Grandma Agnes passed away in 2017, she left behind her treasured cannoli recipe. It was the one she received from her dear mother-in-law, Rosa, who passed on in the 1970s.
To keep their memory alive, it was imprinted on this plate as a keepsake to Jon from his own mother. This sweet gesture was to commemorate Jon’s special time with Grandma Agnes, who taught him how to make cannoli from scratch so he could impress everyone at his college dorm’s Italian night. It was their thing to do together, and now, it can be yours to do with your family.
Grandma Agnes made the cannoli shells with 3 tablespoons of Crisco, 3 tablespoons of sugar, 3 egg yolks, a shot of whiskey, 3 cups of flour, 1 teaspoon of vanilla, and warm water. The filling is enough to fill 3 ½ dozen cannoli shells, which is made with 1 1/2lbs of ricotta, 2 cups of icing sugar, and a pint of heavy cream. To make it, just beat the heavy cream until it’s thick, then add the ricotta, beat the mixture, and add the sugar.
If making the shells seems too daunting, you can always buy them ready-made and then make this filling from Grandma Agnes’ recipe to really impress your friends and family.

BABA'S POLISH BABKA BREAD
2 cups milk (scalded) then add ¾ cup sugar.
Set aside to cool.
1 stick butter. Then add:
8 egg yolks and 1 whole egg
1 oz brandy or whiskey
2 teaspoons salt
Grated rind of lemon or orange
Dissolve 2 yeast cakes (or dry yeast) in ¼ C luke warm water
and pinch of sugar.
Add 3 # flour (2/3 of box) ½ box raisins (more or less) Jar of maraschino cherries (optional) Cut in ½ and drained well.
Allow to rise 2x in bowl – (cover dough) punching down. After 3rd time, shape into leaves (4 medium loaf or round.) Let rise.
Then brush egg whites slightly beaten with sugar. Bake at 300 degrees for 1 hour or until done.
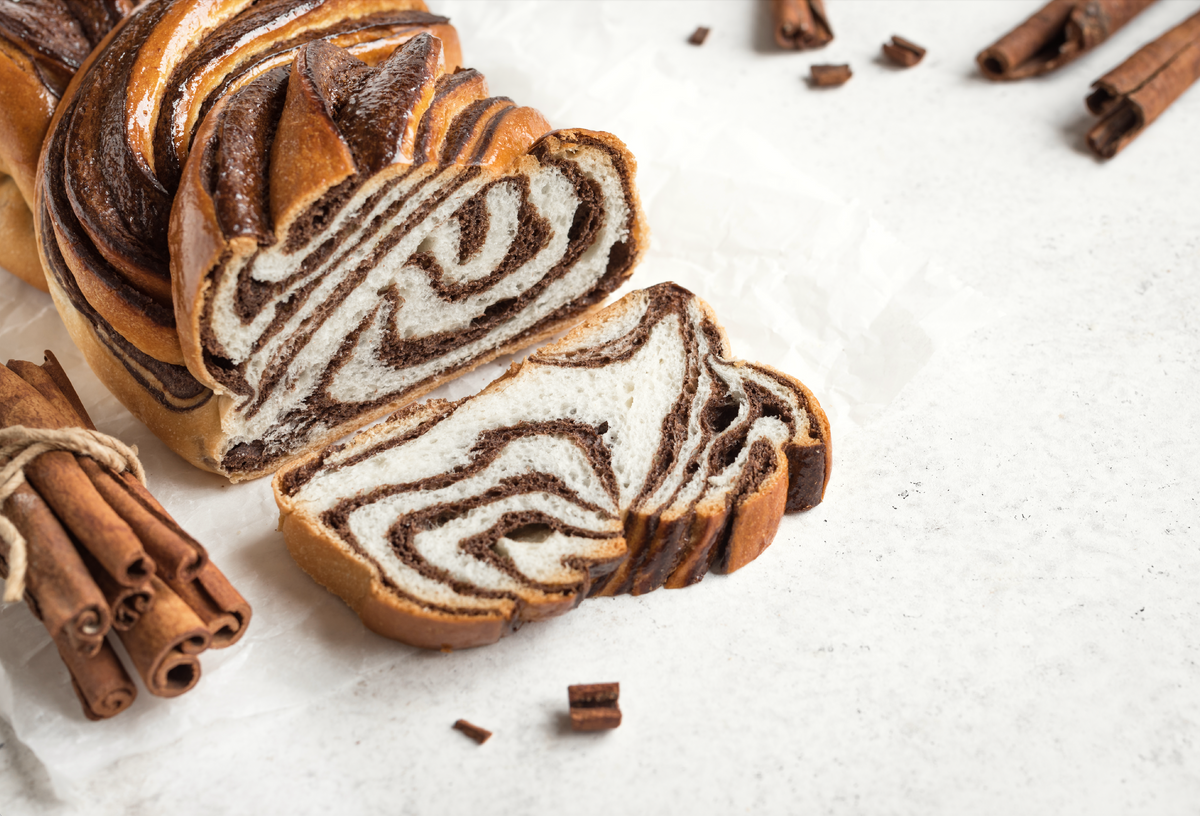
Babka: The Bread-Cake Hybrid That Seinfeld Made Famous
In the 1990s, babka was thrust into pop culture popularity in the Seinfeld episode where Elaine and Jerry buy one from a bakery for a dinner party. But babka, a delight that brings the best of bread and cake into one delicious creation, was iconic long before that.
Babka is a treasured Jewish dessert, often found at religious celebrations. The name ‘babci’ means ‘grandmother’ who also happened to be the person in the household repurposing the challah from Shabbat into this delightful dessert. When immigrants from Poland and other Eastern European countries made their way to America, they brought their cherished babka with them, where it has rightfully earned a top-ranking spot as one of the best desserts.
Traditional forms of babka are made with a yeast-based dough that is twisted into shape around itself along with different fillings, then baked. Sometimes, the top of the babka is finished with streusel or syrup. In that Seinfeld episode, Elaine and Jerry were hoping to buy the chocolate babka though only cinnamon remained.
There was no chocolate version of babka until Jewish immigrants made their way to New York. There, the chocolate was not only more accessible but also more affordable. As for the Polish version, the sweet dough contains dried fruits soaked in spirits like rum or brandy.
Before babka was popularized, you’d have to seek it out from Jewish or Eastern European bakeries, or make it yourself. Despite that it’s now easy to find babka in regular supermarkets and bakeries, you may want to try making this historic dessert for your next gathering.
Babci’s Polish Babka Bread Recipe
Grandma Regina put pen to paper and wrote out the recipe for Polish babka bread sometime before she passed away in 2012. It was a cherished family recipe that belonged to her mother, Romalda Piotrowski, who immigrated from Poland. Romalda was born in 1888, however, this recipe dates back to well before then.
To make Baba’s Polish babka bread, you’ll need 2 cups of scalded milk and add ¾ cup of sugar to it and let it cool. You’ll also need a stick of butter, 8 egg yolks, 1 whole egg, 1 ounce of brandy or whiskey, 2 teaspoons of salt, grated lemon or orange rind, 2 yeast cakes, 3# flour, and a half a box of raisins.
You’ll dissolve the yeast cakes (or use dry yeast) in ¼ cup of lukewarm water with a pinch of sugar. Add the 3# of flour, about 2/3 of the box. Then add the raisins, and if you like, a jar of maraschino cherries. The cherries are optional but add a wonderful flavor. Just make sure you cut them in half and drain them well.
Let your dough rise 2x in the bowl, covered. Then punch it down. After the 3rd time, you can shape it into leaves so you have 4 medium loaf or round, then let it rise. After rising, you’ll brush the egg whites that are slightly beaten with sugar onto the dough. Bake it at 300F for 1 hour or until it’s done.
This sentimental family recipe honors Romalda, Regina, and all the ancestors of the family every time it is made and is fantastic for serving at any occasion, or to give as a gift.
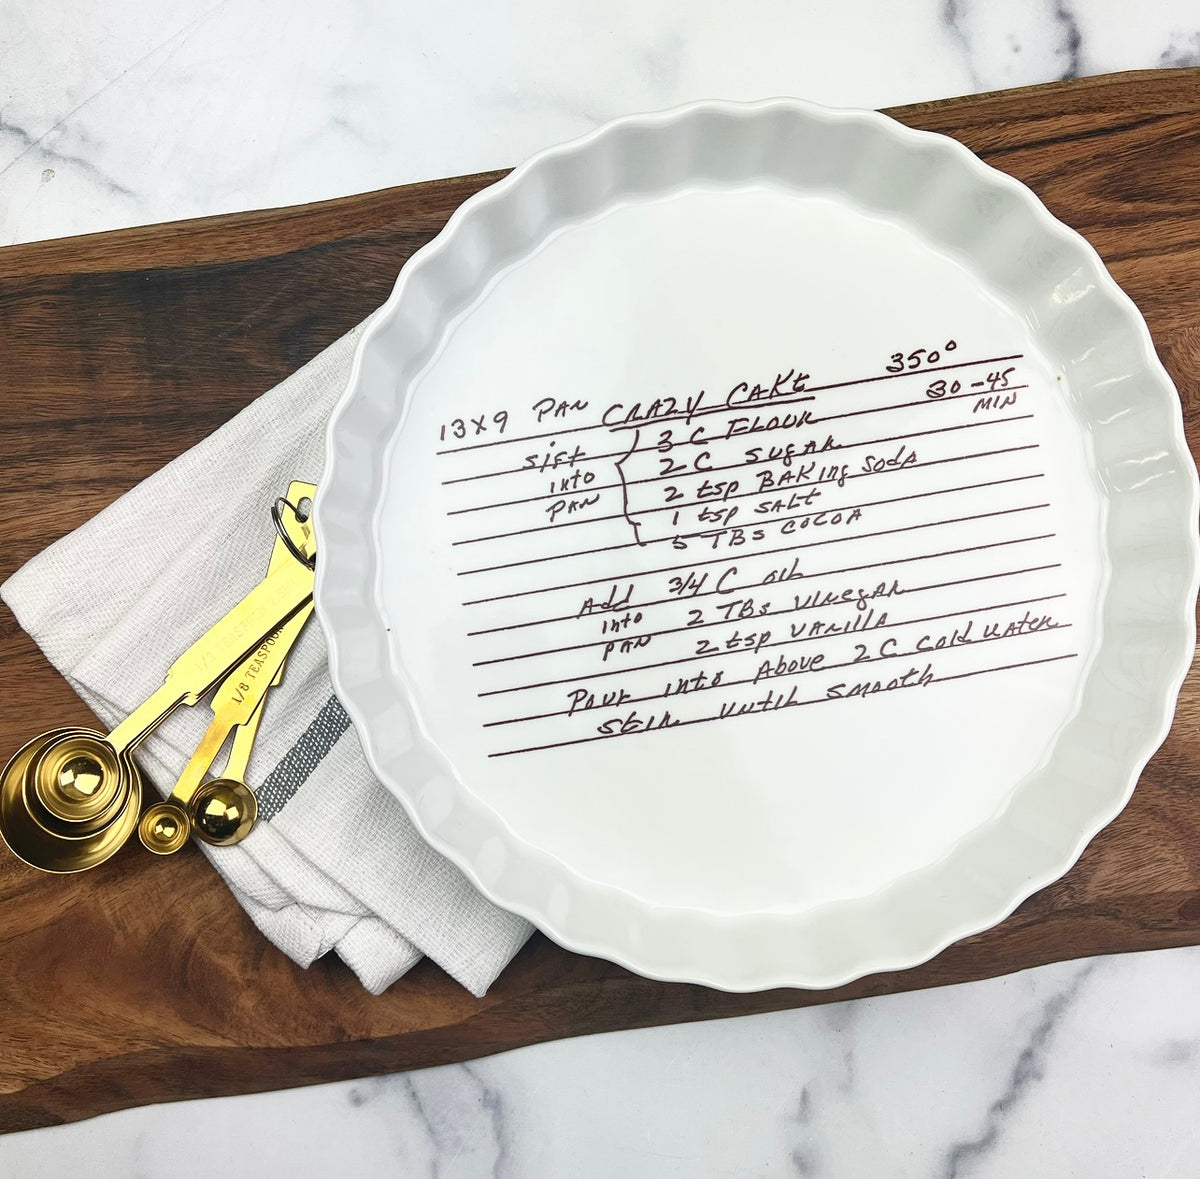
CRAZY CAKE
Sift into 9x13 pan:
3 cups flour
2 cups sugar
2 tsp baking soda
1 tsp salt
5 Tbs Cocoa
Add into pan:
¾ C oil
2 Tbs vinegar
2 tsp vanilla
Pour into above 2 C cold water, stir until smooth.
Bake 30-34 minutes at 350 degrees.
Crazy Cake: The Sweet Way Our Ancestors Rode Out the Great Depression
If you’ve ever wanted to bake up a rich, moist, and chocolatey cake but realized you were out of eggs, butter, and milk, then you’ll want to save this crazy cake recipe. Also known as ‘wacky cake,’ ‘war cake,’ and ‘depression cake’ among other names, you can call it what you’d like but the crazy truth about this crazy cake is that you don’t need eggs, butter, or milk to make it.
The roots of crazy cake go back to the Great Depression. Back then, the economic collapse created food scarcity. Things like eggs, butter, and dairy products were hard to come by so they were rationed. Back then, people were only permitted to buy a small amount so that everyone could get their fair share. As such, homemakers had to get creative with the ingredients they had on-hand.
While it comes from a dark time in history, it’s a reminder to make the best of things. And because crazy cake is so simple to make with typical pantry staples, it has seen quite a resurgence over the decades. It came back in full force in the 1960s and 1970s, likely the result of the now-grown children who endured the Great Depression finding those old recipe cards.
Even today, crazy cake is popular once again as those enduring lockdowns passed the time by baking treats to cheer themselves up. It’s a recipe that will likely outlast us all, one that every generation will cherish during hard times and when things are turning right for the world.
Ginny’s Crazy Cake Recipe
Grandma Ginny raised six children and with Grandpop, she made a loving environment for her many grandchildren to visit. She wrote this crazy cake recipe in the late 1950s/early 1960s and made it often for her children. As the generations carry on, the love of chocolate continues, and so does the love for Ginny’s crazy cake recipe.
You’ll need a 13x9 pan. Once you have that, sift in 3 cups of flour, 2 cups of sugar, 2 teaspoons of baking soda, a teaspoon of salt, and 5 tablespoons of cocoa. Once sifted into your pan, you will add ¾ cup of oil, 2 tablespoons of vinegar, 2 teaspoons of vanilla, and 2 cups of cold water. Stir it all until smooth, then bake at 350F for 30 to 45 minutes.
Perhaps what’s craziest of all is that this cake comes out with such richness and a moist texture, even without the typical ingredients we’ve come to include in cake during better times. As prices rise today, it might be a great one to try to give the family a delicious treat made from the simplest of pantry ingredients.

PUMPKIN BARS
2 Cups sugar
4 eggs
2 cups flour
2 tsp baking powder
1 cup oil
1 tsp soda
2 cup pumpkin
1 tbls cinnamon
Mix all ingredients well with a mixer. Pour into greased jelly roll pan. Bake at 350 degrees for 24 minutes.
Frosting:
3 cup powdered sugar
1 stick of butter
8 oz cream cheese
Combine and beat to smooth. Frost when cool.
Pumpkin Bars: Raising the Bar for Every Dessert Table
When you have a family gathering, a bake sale, a potluck, or any other event where dessert is called for, a bar dessert is one of the easiest ways to please. It’s easier on you as the baker, for you can simply bake it in a pan and then cut it into squares, or bars.
Perhaps the ease of making bar desserts is what gave rise to such a staple of the iconic dessert table. Dessert bars come in an array of flavors though most people tend to picture the tart yet sweet and tangy lemon bars which may have come to use from Trinidad and Tobago.
With the rise of pumpkin bars though, it seems the Amish may be the ones to thank for this scrumptious creation. Certainly a viable option for fall holiday tables or even for Christmas, pumpkin bars have that warming aroma from the pumpkin and cinnamon. And because pumpkin tends to keep things moist, these heavenly square are slices of pure perfection in texture too.
Most bar desserts are made with flour, sugar, eggs, baking powder, baking soda, and other seasonings. Pumpkin bars will always have canned pumpkin and some sort of spice like cinnamon. They tend to be frosted with cream cheese frosting which makes for a lusciously sweet combination.
Grandma Phyllis’ Perfect Pumpkin Bars
Phyllis Steiner, or Grandma Phyllis as she was known to her family, was born in 1930. During her life, she was known for her famous garlic toast on the savory end of things. And for dessert, her pumpkin bars were an absolute treasure.
Although Grandma Phyllis passed away in February of 2019, her recipe for her perfect pumpkin bars is one you can make today and pass along to your own family.
To make Grandma Phyllis’ pumpkin bars, you’ll need 2 cups of sugar, 2 cups of flour, a cup of oil, 2 cups of pumpkin, 4 eggs, 2 teaspoons of baking powder, 1 teaspoon of baking soda, and 1 tablespoon of cinnamon.
When using pumpkin, be sure that you’re choosing the canned pumpkin and not the pumpkin pie filling. Pumpkin pie filling is seasoned and can affect the way this recipe comes out.
Once you have all the ingredients, mix them well and pour them into a greased pan. You’ll then bake them at 350F for 25 minutes. While they cool, take 3 cups of powdered sugar, a stick of butter, and 8 ounces of cream cheese, then beat until smooth. Once the pumpkin bars are cool, you can frost them.
You can also use ready-made cream cheese frosting if you like, though it won’t come out with the same undeniably delicious flavors as Grandma Phyllis made. It’s not necessary to wait until fall to enjoy these pumpkin-flavored treats either, so make them any time!

JUNE'S CHOCOLATE PIE
1 Cup sugar
½ tsp. salt
1 Tbsp flour
2 ½ tbsp cornstarch
1 tall can evaporated milk
1 cup water
2 sq. unsweetened chocolate
2 eggs – beaten to a froth
2 Tbsp butter
1 tsp vanilla
1 - 9” pie shell
½ pt. Whipped cream
Method: In heavy saucepan combine – cook 1 minute longer over low heat…stirring. Remove from heat. Stir in butter and vanilla. Pour immediately into pie shell. Chill.
Top with whipped cream and garnish with chocolate bits, if desired.

Chocolate Pie: A Sweet and Creamy Treat Inspired by Ancient Egyptians
The ancient Egyptians certainly didn’t serve up slices of chocolate pie. However, pie has been around since their time. Early pies were made by the Romans, and it’s said that the Greeks taught them how to make them.
Back then though, the pies were made with reeds that weren’t meant for eating. The reeds simply held the filling in place. Good thing we have pie crusts today!
As word spread about these pies in Europe, it became a staple in the English language since it was noted as a popular word back in the 14th century. The first pie recipe ever published was made by the Romans. It contained goat cheese and honey in a rye crust.
In those early days, pies were filled with meat. They were spelled as ‘pyes’ and the crusts were called the ‘coffyn.’ In fact, the crust dominated more than the filling. Pies made with fowl left the legs hanging over the sides, intended to use as handles. It wasn’t until around the 1500s when pies that resemble them as we know them with fruits and sweet fillings were made.
The first English settlers brought pies to America. These pies also contained crusts that weren’t designed for eating but rather for hosting the filling as it baked. During the American Revolution, ‘crust’ took over as the term, a more uplifting word than ‘coffyn,’ for sure.
As for chocolate pie, it’s uncertain where it came from though most historians believe it to resemble the French tarte au chocolat. Cream pies like the humble chocolate cream pie were very popular in the American Midwest where dairy farms are at every turn, and as such, it is believed we have this region to thank for this sweet, rich, luscious, and chocolatey dessert that is perfect for holidays or any gathering occasion.

June’s Classic Chocolate Pie Recipe
June Firth typed up this chocolate pie recipe on her very first personal typewriter. She wasn’t the original creator of the recipe, though it was a special one from her childhood best friend’s mother. Grandma June certainly perfected it over her years living in Cincinnati, Ohio. She was known as the life of the party on every occasion.
While June’s chocolate pie recipe itself is at least 100 years old, she typed it on her typewriter in the 1960s. It was everyone’s birthday treat and was thought to be a gift rom her best friend’s mother for each of her birthdays. Then June started making it for everyone else’s birthday in the family. Cousin Ashley still requests it for her birthday and Aunt Nancy continues the tradition, emulating Grandma June’s touch to a “T.”
To make June’s chocolate pie, you’ll need 1 cup sugar, ½ tsp salt, 1 tablespoon flour, 2 ½ tablespoon cornstarch, 1 tall can evaporated milk, 1 cup water, 2 squares unsweetened chocolate, 2 eggs beaten to a froth, 2 tablespoons butter, 1 teaspoon vanilla, one 9-inch pie shell, and whipped cream (a ½ pint).
In a heavy saucepan combine the sugar, salt, flour, cornstarch, milk, water, and chocolate. Bring it to a boil and cook 3 minutes or until mixture thickens, stirring constantly. Remove from heat. Stir about ½ of hot mixture into eggs then combine with balance of mixture in saucepan. Cook 1 minute longer over low heat, stirring. Remove from heat. Stir in butter and vanilla. Pour immediately into pie shell, then chill. Top with whipped cream and garnish with chocolate bits, if desired.
This recipe will no doubt become a favorite in your family when you make it too!
STRAWBERRY JELL-O SALAD
2 boxes cherry or strawberry jello
2 cups hot water - Dissolved
Add 2 packages frozen strawberries (10 oz)
2 bananas (Mashed)
1 can crushed and drained pineapple
Let half jello Jell – spread with ½ pt: sour cream (8 oz)
Add rest of jello and jell.
Strawberry Jell-O Salad: An Elite History that Dates Back to Medieval Times
Love them or hate them, gelatin dishes have been around for centuries. Anything jellied was considered a regal dish, molded elaborately to pose as centerpieces for those of nobility. Back then, they didn’t have Jell-O available to make these formed gelatin dishes, so cooks underwent the time-consuming and laborious processes of rendering collagen from animal bones.
As such, gelatin dishes were reserved for those among high-society sets, for no regular home cook had the time to invest such labor into everyday or even holiday meals. They were upheld as a status symbol even in the American colonies. Thomas Jefferson famously had wine jelly served to his guests at his Monticello estate for this reason.
But times change, as they always do, and in the mid-19th century, that Industrial Revolution brought with it the rise of factory production, paving the way for a cough syrup maker to patent Jell-O as a brand name. The brand tapped right into domestic life, and thus, the instant gelatin movement was born, helping housewives make these molded salads an iconic item on dinner tables across the country.
These boxes of gelatin helped them contain leftovers and didn’t require the addition of sugar. By the early 1900s, Jell-O sales were on the rise, and in 1905, Mrs. John Cooke won the third prize in a cooking contest with “Perfection Salad,” featuring cabbage, celery, and red pepper encased in molded Jell-O. While today, we might find this sort of concoction the stuff of nightmares, it paved the way for those sweet Jell-O salads to emerge.
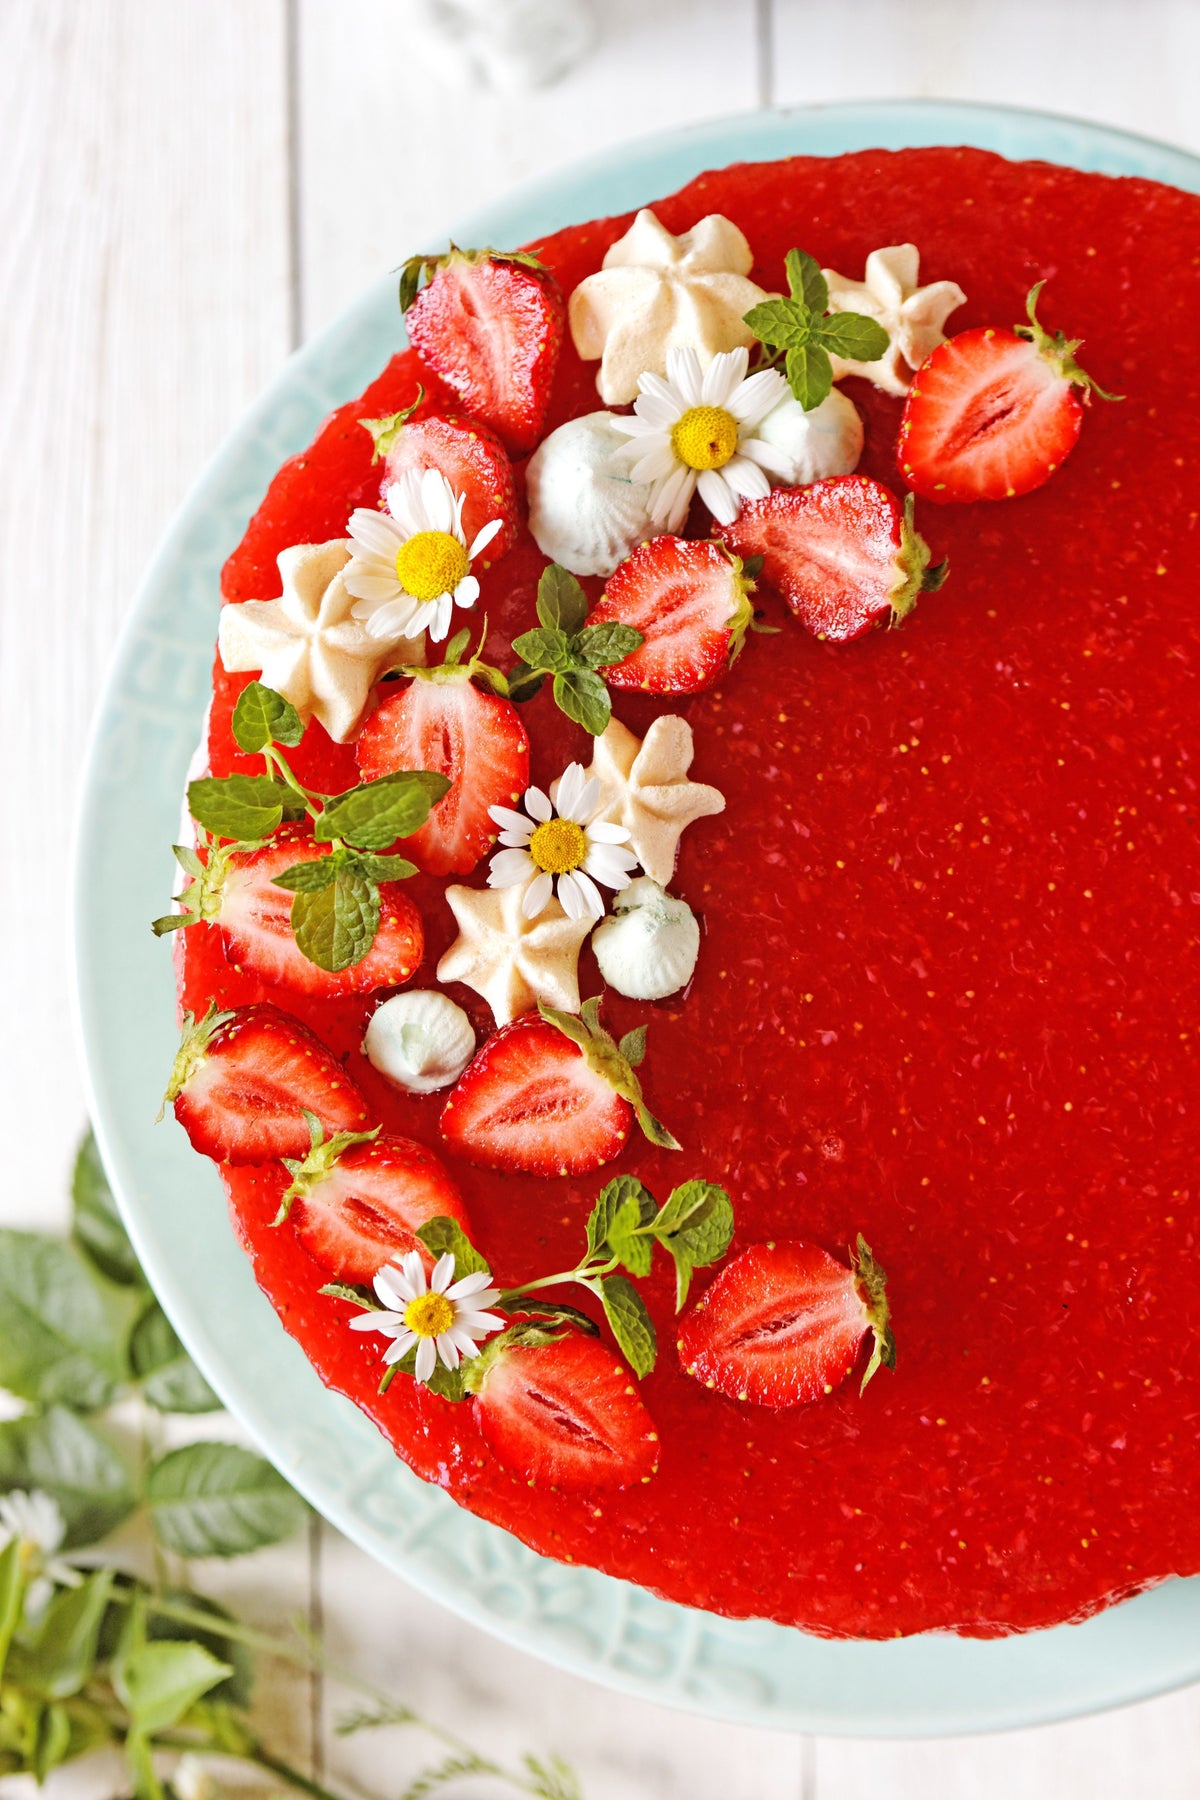
Once those strawberry Jell-O salads started emerging, it allowed every woman to achieve that higher social status with dainty yet affordable dishes to impress guests. For a retro feel and classic delight, try making one to bring to the next potluck you attend.
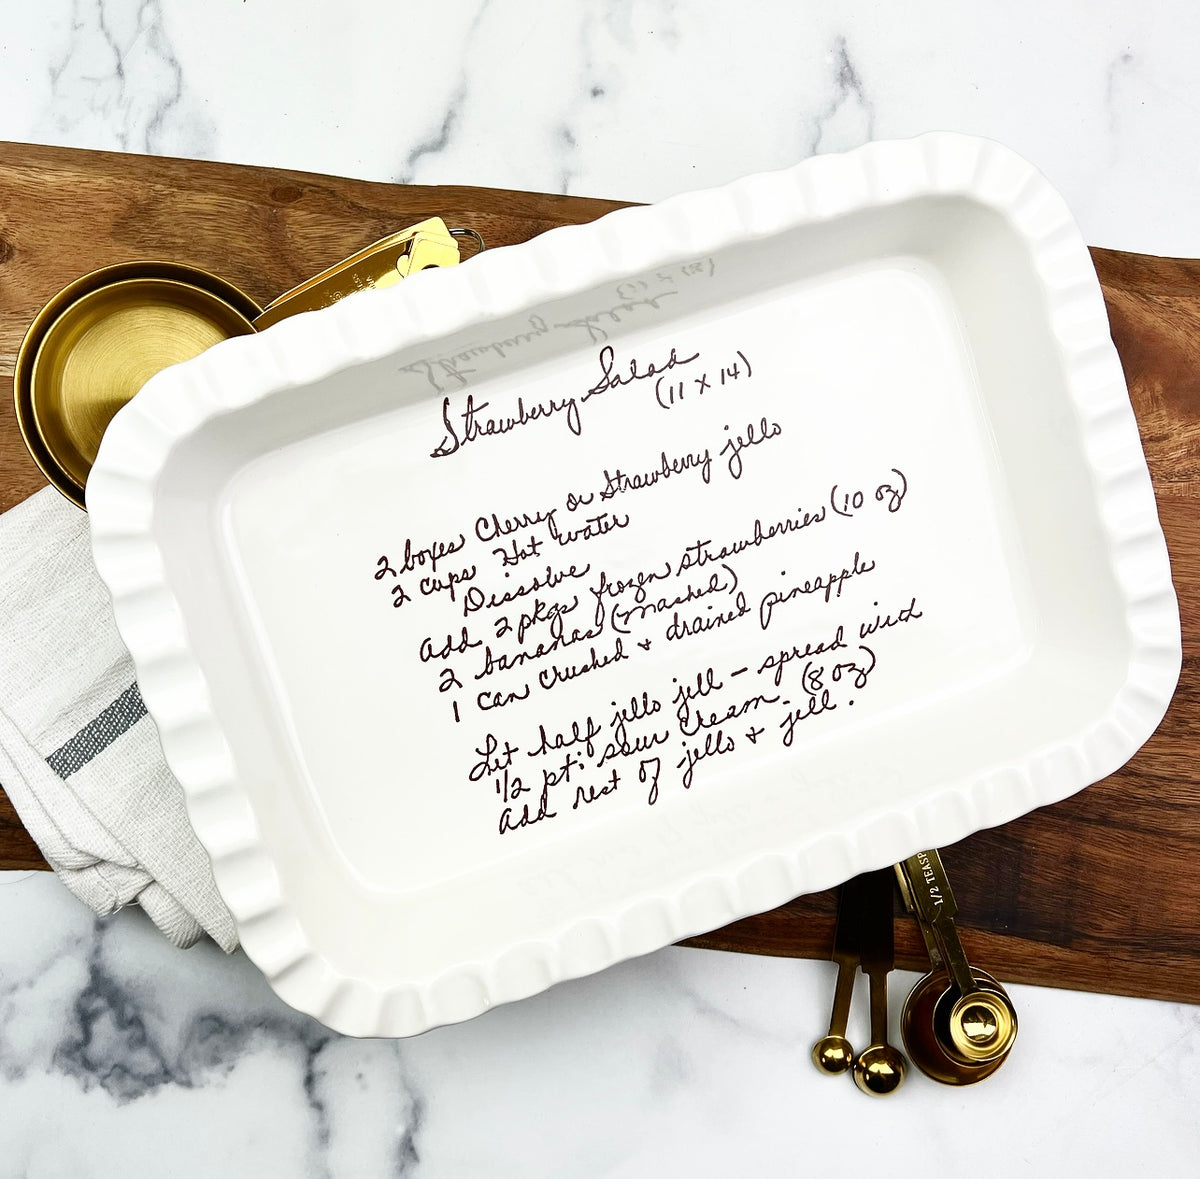
Marie’s Strawberry Jell-O Salad Recipe
Christy Allen has graciously shared this recipe from her mother, Marie Harrell, who hand-wrote it, possibly sometime in the 1980s. In memory of Marie who passed away 4 years ago from breast cancer, Christy wanted to honor her traditions of making this dish for Thanksgiving as well as Christmas holidays.
As Marie loved the holidays and enjoyed having everyone in her home, this strawberry salad recipe is one that Christy hopes will bring your family closer together too while keeping the memory of her devoted mother alive.
This very special family recipe for strawberry Jell-O salad couldn’t be any easier. You’ll need 2 boxes of strawberry (or cherry) Jell-O, 2 cups of hot water, 2 packages of frozen strawberries (10 ounces), 2 mashed bananas, a half pint of sour cream (8 ounces), and 1 can of crushed and drained pineapple.
You’ll first dissolve the Jell-O into the hot water. Then you’ll add the frozen strawberries, bananas, and pineapple. Let half the Jell-O jell together, then spread with the sour cream. Add the rest of the Jell-O and let it set, then serve at your next special occasion.
ZUCCHINI AND CHESSE QUICHE
2 large zucchini
1 large onion
Salt, oregano (1/2 tsp salt,1 tsp oregano)
Dice zucchini and onion – add seasoning, mix and let stand.
Beat 4 large eggs – add ¾ Cup oil. Mix 2 cups Hungry Jack (Plain)
8 oz shredded cheddar cheese – mix well.
Put zucchini into egg mixture – grease large 9x13 pan.
Bake 45 minutes at 350 degrees.

Quiche: The Savory French Tart Everyone Loves for Sunday Brunch
While most people know quiche from the typical brunch menu, they tend to assume it’s a French dish. However, ‘quiche’ is a word that comes from a German dialect known as Franconian melded with that of the Lorraine region in France.
The word in question is ‘küeche’ which translates to ‘cake’ and this simple fact will make for a fascinating way for you to approach your next brunch with quiche. While it is always considered a French dish, it came from Germany. Pastry tarts filled with sweet as well as savory items date back to England in the 14th century.
Perhaps we can all agree that it’s a European dish, one that focuses on the savory side of things. Quiche is more or less an open-faced tart that invites plenty of creativity. Quiche Lorraine is by far the most popular version, made with smoked bacon folded into a custard filling. Later on, the addition of Gruyère cheese made this brunch pastry offering a fixture on café and brunch menus across the globe.
Now you’ll find quiche ready to go in the supermarket too, and with loads of flavors that include cheese, tomatoes, spinach, ricotta, broccoli, and more. Even with zucchini and cheese, you will have an impressive dish that works for Sunday brunch or Sunday dinner with absolute ease.

Shirley’s Zucchini and Cheese Quiche Recipe
Shirley Kabat originally wrote this recipe in the 1980s. She was a dedicated woman who was adored in her life as a daughter, wife, mom and Bubbie. This recipe for zucchini and cheese quiche has been passed down to 2 generations and is a family favorite.
Commemorating it in the form of a platter, now Shirley’s beloved family recipe for zucchini and cheese quiche can impress your loved ones in your kitchen. To make it, you’ll need 2 large zucchini, 4 large eggs, ¾ cup of oil, 2 cups of plain Hungry Jack, 8 ounces of shredded cheddar, 1 large onion, 1/2 teaspoon of salt, and 1 teaspoon of oregano.
You’ll need to dice the zucchini and onion, then add the seasoning and mix it together. Let this stand, meanwhile, beat the eggs. Then add the oil and mix in the Hungry Jack. Add the shredded cheddar cheese and mix it well. Now you’ll add the zucchini into your egg mixture.
Be sure to grease a large 9x13 pan before adding it in there. Then you’ll bake your zucchini and cheese quiche in a preheated oven to 350F. Bake it for 45 minutes and you’ll have a delicious quiche that everyone will ask you to make again and again!